Add Yocto SDK with QT5 to QT Creator: Difference between revisions
Pzimmermann (talk | contribs) No edit summary |
Pzimmermann (talk | contribs) (Commented the section about the environment, because it makes problems with qmake) |
||
| Line 50: | Line 50: | ||
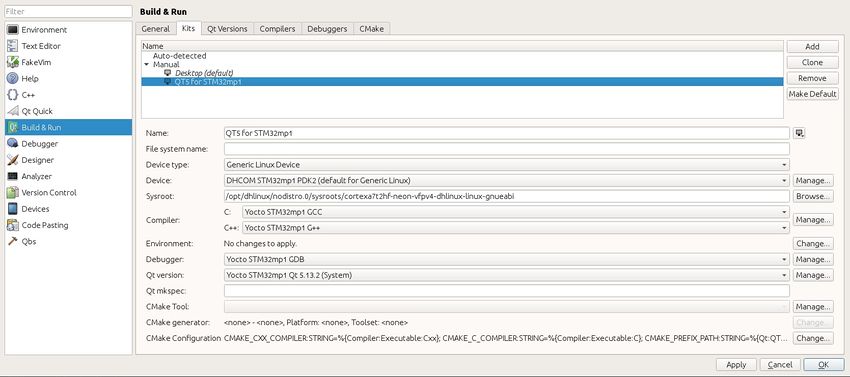
[[Image:Qtcreator-add-kit.jpg|850px]] | [[Image:Qtcreator-add-kit.jpg|850px]] | ||
<!-- | |||
As the final point you have to set the environment of the kit: Select "Change" at "Environment:". Now a window for editing text opens. Copy all environment variables (all lines with "export"-statement) from the environment setup script /opt/dhlinux/nodistro.0/environment-setup-cortexa7t2hf-neon-vfpv4-dhlinux-linux-gnueabi and its imported files (at the end of the script) into the window. Each line should contain one environment variable assignment and "export" has to be removed. | As the final point you have to set the environment of the kit: Select "Change" at "Environment:". Now a window for editing text opens. Copy all environment variables (all lines with "export"-statement) from the environment setup script /opt/dhlinux/nodistro.0/environment-setup-cortexa7t2hf-neon-vfpv4-dhlinux-linux-gnueabi and its imported files (at the end of the script) into the window. Each line should contain one environment variable assignment and "export" has to be removed. | ||
| Line 159: | Line 160: | ||
</div></div> | </div></div> | ||
--> | |||
If there is a warning/error shown, please click apply between each step | If there is a warning/error shown, please click apply between each step | ||
Revision as of 06:43, 2 July 2020
The following instructions are based on DHCOM STM32MP1 computer on module and Yocto version "zeus"
Prepairing your virtual machine
Get the Virtual Machine for Application Development.
Install the following package:
$ sudo apt-get install qtcreator qt5default
Download and install the SDK package
Get the QT5 SDK for STM32mp1
Unpack the archive and install the toolchain.
$ sh ./dhlinux-glibc-x86_64-meta-toolchain-qt5-cortexa7t2hf-neon-vfpv4-toolchain-nodistro.0.sh
Choose the installation directory (default: /opt/dhlinux/nodistro.0/).
The toolchain is now installed to your system.
Configure Qt Creator
Run QT Creator
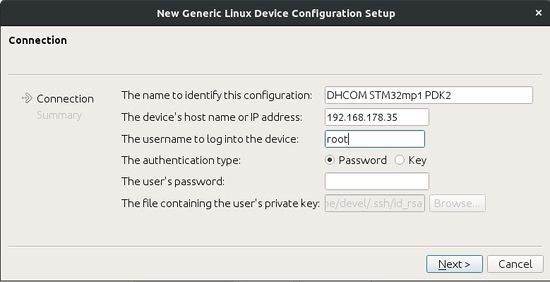
In Qt Creator go to Tools > Options > Devices and add your Wandboard as a generic linux device.
go to Tools > Options > Build & Run and:
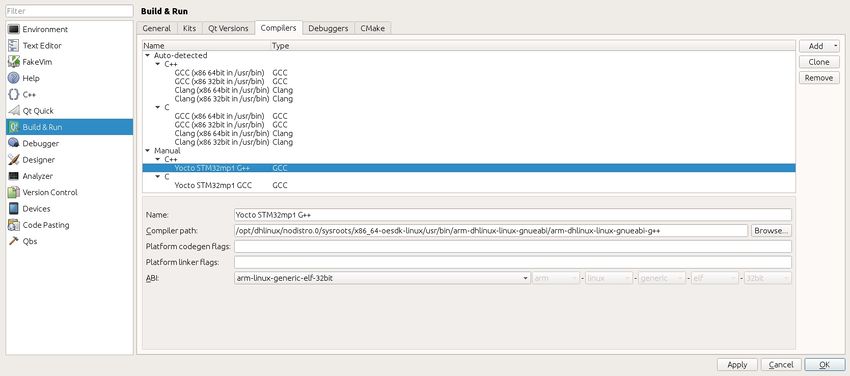
Add a new c++ compiler. Select your compiler: /opt/dhlinux/nodistro.0/sysroots/x86_64-oesdk-linux/usr/bin/arm-dhlinux-linux-gnueabi/arm-dhlinux-linux-gnueabi-g++
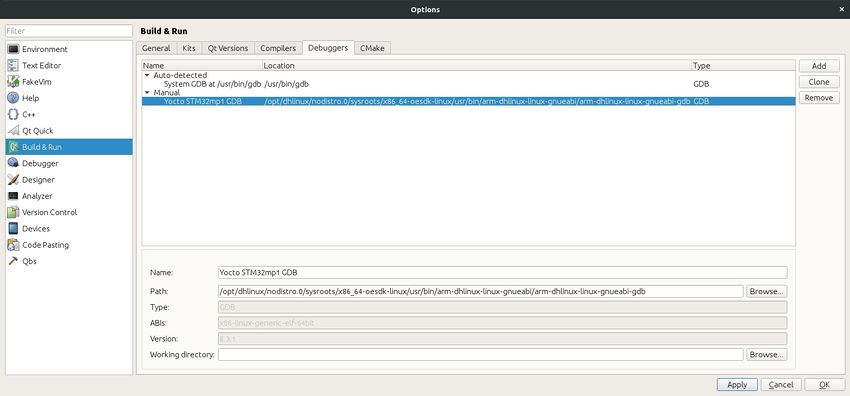
Add a new debugger. Select your debugger: /opt/dhlinux/nodistro.0/sysroots/x86_64-oesdk-linux/usr/bin/arm-dhlinux-linux-gnueabi/arm-dhlinux-linux-gnueabi-gdb
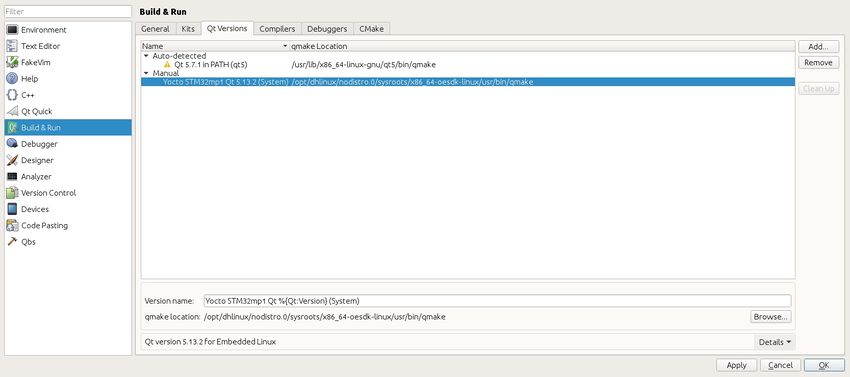
Add your Qt version by selecting the qmake located in /opt/dhlinux/nodistro.0/sysroots/x86_64-oesdk-linux/usr/bin/qmake
Add a new kit selecting your new Qt5 version and compiler and setting the sysroot to /opt/dhlinux/nodistro.0/sysroots/cortexa7t2hf-neon-vfpv4-dhlinux-linux-gnueabi and leave the Qt mkspec empty. Then select your device
If there is a warning/error shown, please click apply between each step
